Nobody pulls a cylinder head on a 2UZ-FE for fun. You are here because of a blown head gasket, an overheating problem that survived every easier fix, or valve work that cannot be done with the head on the truck. Before you order parts, you deserve an honest picture of what this job contains, where it goes wrong, and which numbers decide whether the repair lasts. The GX470 (2003-2009) is the focus here; the same V8 lives in the LX470, Land Cruiser 100, V8 4Runner, Tundra, and Sequoia, and the job is a close cousin on all of them.
Confirm the head has to come off
Head gaskets on this engine are not a common failure, so earn the diagnosis before you commit to the deepest job on the truck. Coolant loss with no puddle, a cooling system that pressurizes a cold engine, white exhaust smoke that smells sweet, or bubbles in the overflow bottle all point this direction, but each has cheaper imitators. A combustion leak (block) test, a cooling system pressure test, and a leakdown test will separate a gasket failure from a cracked hose nipple or a tired water pump. If two cylinders next to each other show low compression, that is the classic gasket signature. If the tests say the gasket is fine, believe them and keep looking; you do not want to discover that after the timing belt is off.
You are really signing up for three jobs at once
The head gasket itself is a thin part buried under two complete jobs. To reach it you first do the full timing belt job, then a camshaft removal on the bank you are opening, then clear everything that lives in the valley between the heads and everything bolted across them: intake manifold, coolant inlet and bypass plumbing, the air switching valve, the rear timing plates, and the front exhaust separation. Only then do the ten head bolts per head come out, in a printed sequence, and the head lifts off its dowels. The engine stays in the truck for all of this; what leaves is your weekend, probably two.
| Phase | What it actually involves | The part people underestimate |
|---|---|---|
| Diagnosis | Block test, pressure test, leakdown | Skipping it and being wrong |
| Timing belt | Covers, crank pulley, belt, tensioner, cam pulleys | It is a full job by itself, not a preliminary step |
| Camshafts | Covers, bearing caps, four cams per engine | The sub-gear service bolt (below) |
| Valley and plumbing | Intake manifold, coolant bypass pieces, air switching valve | Every gasket and O-ring is one-time use |
| Exhaust separation | Front pipe separated; manifolds stay on the heads | Rusted pipe nuts at 46 ft·lbf of patience |
| Head lift | Ten bolts per head out in sequence, head off the dowels | The lift itself; get a second pair of hands |
The three traps
The plate washer drop. Each head bolt carries a plate washer, and the head has an opening where a dropped washer falls straight through the head and block into the oil pan. There is no fishing it out; the pan comes off. Treat every washer like it is actively trying to escape.
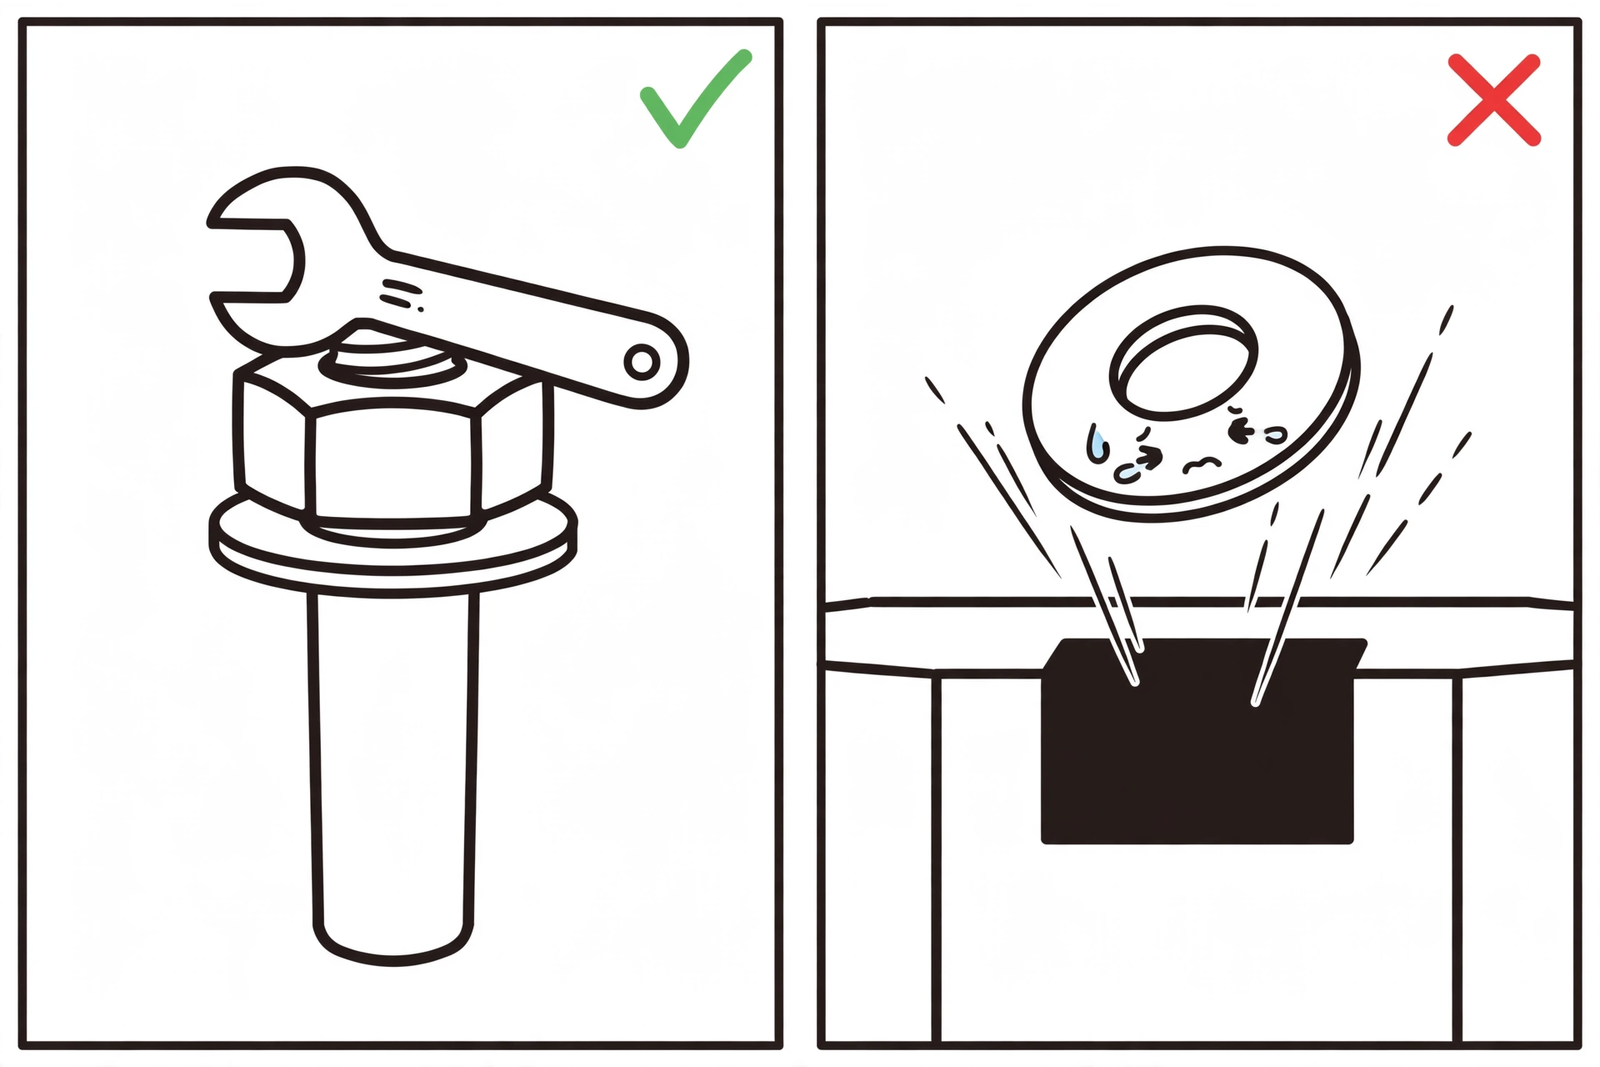
Plate washer trap. Left: washer seated on the bolt, where it belongs. Right: a dropped washer falls through the head into the oil pan.
Bolt order, both directions. The manual prints a specific sequence for loosening and a specific sequence for tightening, and they are not suggestions. An aluminum head on an iron block warps when one side lets go first. Loosen in the printed order, a little at a time. Tighten the same way.
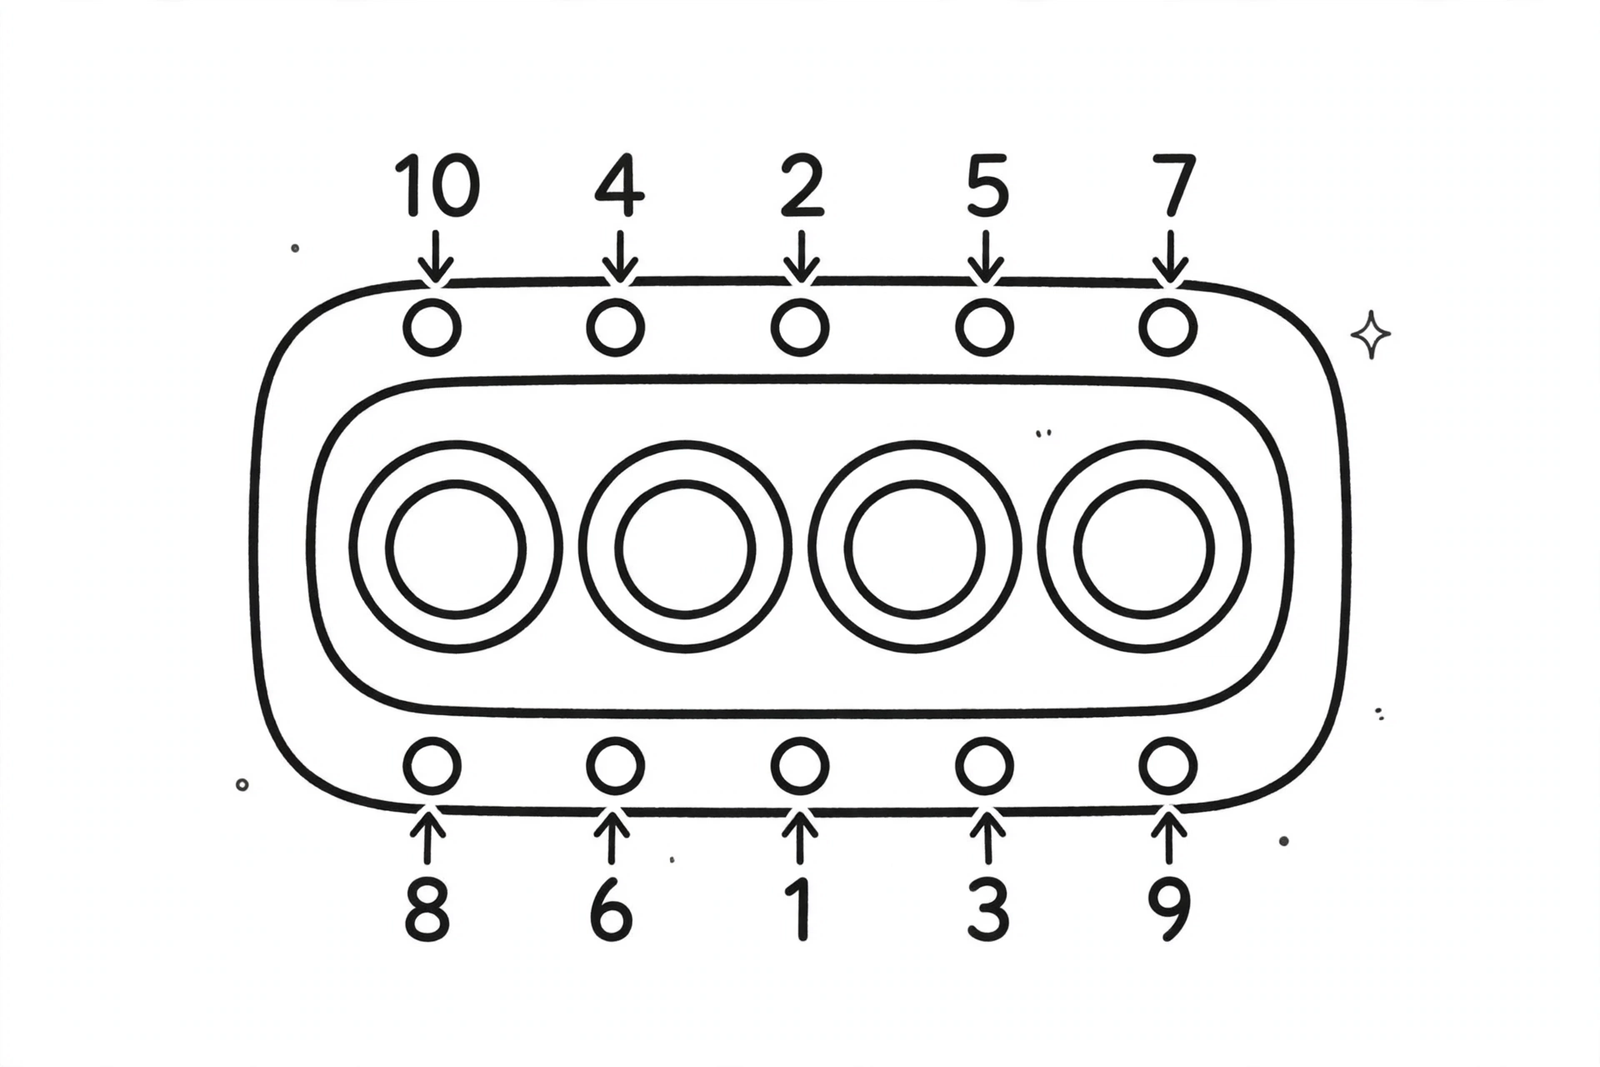
Head bolt tightening sequence, one head. Start at 1 and follow the numbers.
The cam sub-gear. The exhaust cams carry a spring-loaded sub-gear. Before a cam comes out, you rotate the sub-gear’s service hole to the top and thread in a service bolt to lock the sub-gear to the main gear. Skip it and the gear snaps out of mesh under spring tension, and reassembly becomes a research project.
The numbers that decide whether it seals
Torque alone does not clamp these heads; the bolts are torque-plus-angle, and the measurements below come from the factory service manual. Check all of them before anything goes back together.
| Spec | Value |
|---|---|
| Head bolts per head | 10 |
| Head bolt install | Oil the threads and bolt undersides, torque to 40 N·m (30 ft·lbf) in sequence, then +90°, then +90° more |
| Block deck warpage limit | 0.07 mm (0.0028 in.) |
| Cylinder head warpage limit | 0.10 mm (0.0039 in.) |
| Head bolt thread diameter | 9.810 to 9.960 mm standard; replace any bolt measuring under 9.700 mm |
| Front exhaust pipe nuts | 62 N·m (46 ft·lbf), new gasket |
Two more that matter at reassembly: the head gaskets are bank specific, stamped 2R for the right bank and 2L for the left at the rear of the gasket, and the head goes back on with the crank positioned so the piston sits below top dead center on the compression stroke, so an open valve cannot meet a piston while you work. Mark each bolt head with paint before the angle turns; a finished bolt’s paint mark should sit at 180 degrees.
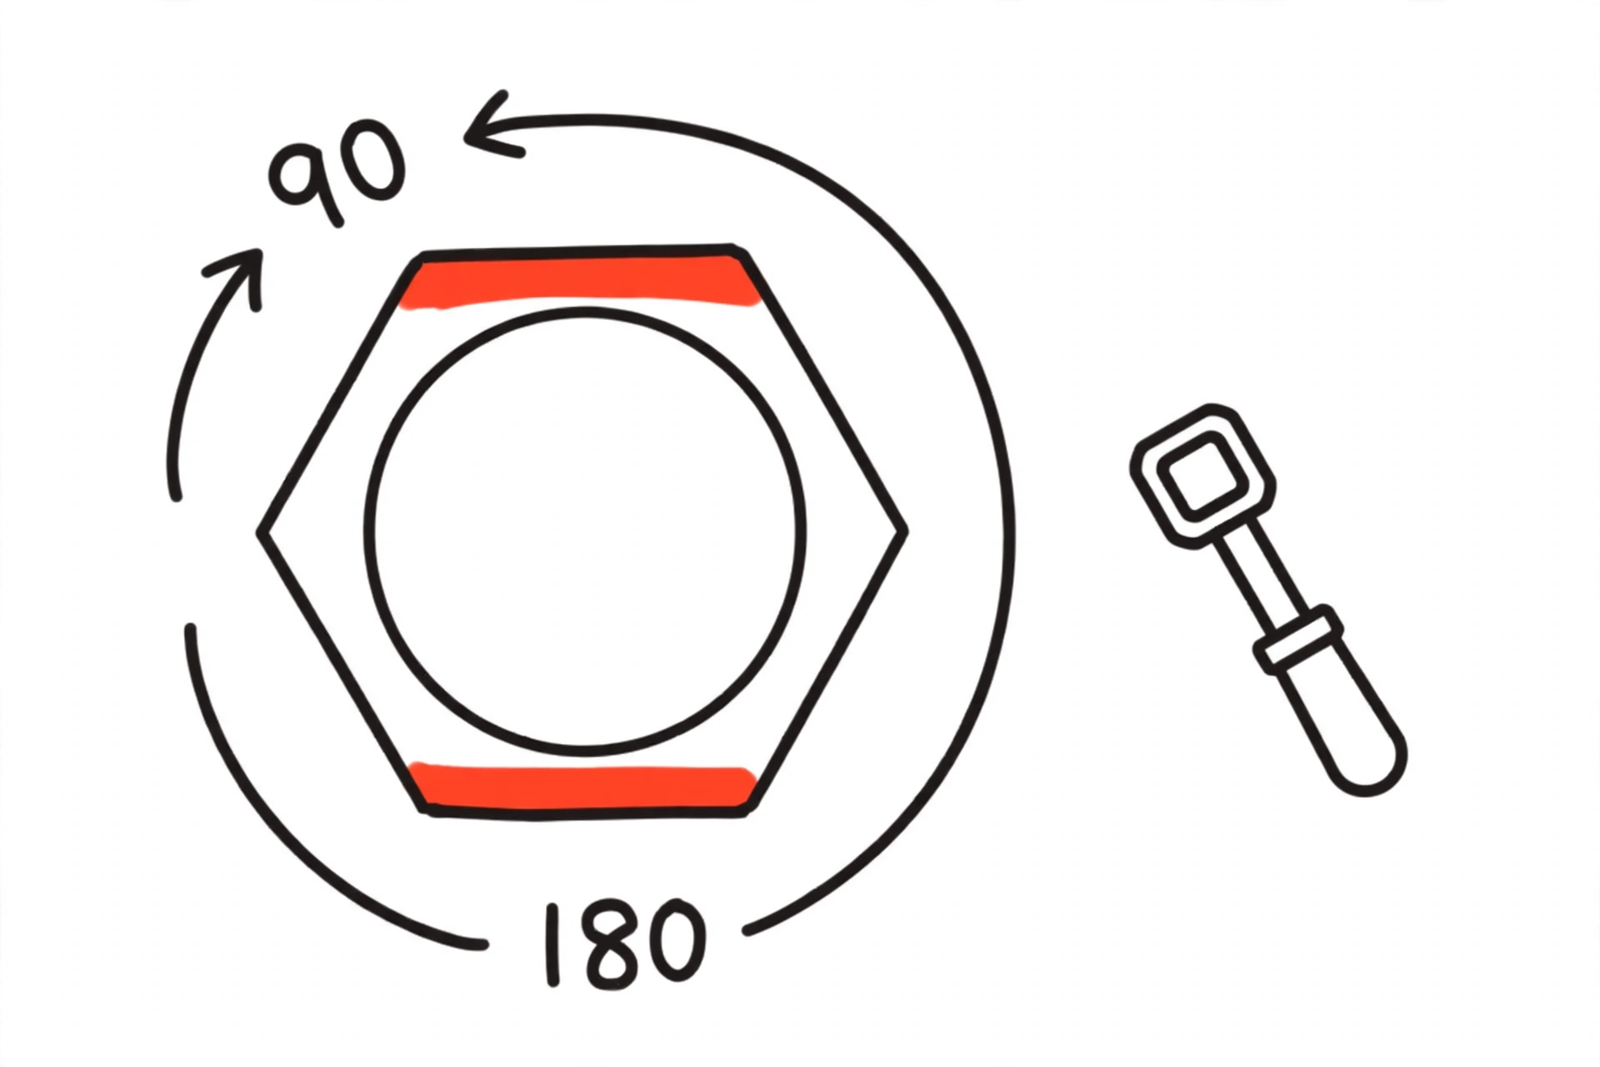
Paint-mark each bolt head, turn 90 degrees, then 90 more. The mark ends at 180 degrees.
While it is apart
You will never have cheaper access to the valley and the front of this engine, so price these into the job from the start: a full timing belt kit (the old belt never goes back on), every valley gasket and O-ring you disturbed, valve cover gaskets, spark plugs, and a hard look at the coolant bypass hoses and the starter, which lives under the intake manifold on this engine. A starter replacement with the manifold already off is an hour of your life; the same job later is an afternoon.
Measure, then decide about the machine shop
Run a precision straightedge and feeler gauge across the block deck and the head surface in several directions and compare against the limits in the table. If the head came off for overheating or coolant loss, also check for cracks with dye penetrant around the combustion chambers and ports; a flat head can still be a cracked head. Anything past the warpage limit, or any crack, goes to a machine shop for surfacing or replacement. What you should not do is compensate with sealant, a thicker gasket, or hope. The labor to redo this job dwarfs the machining bill.
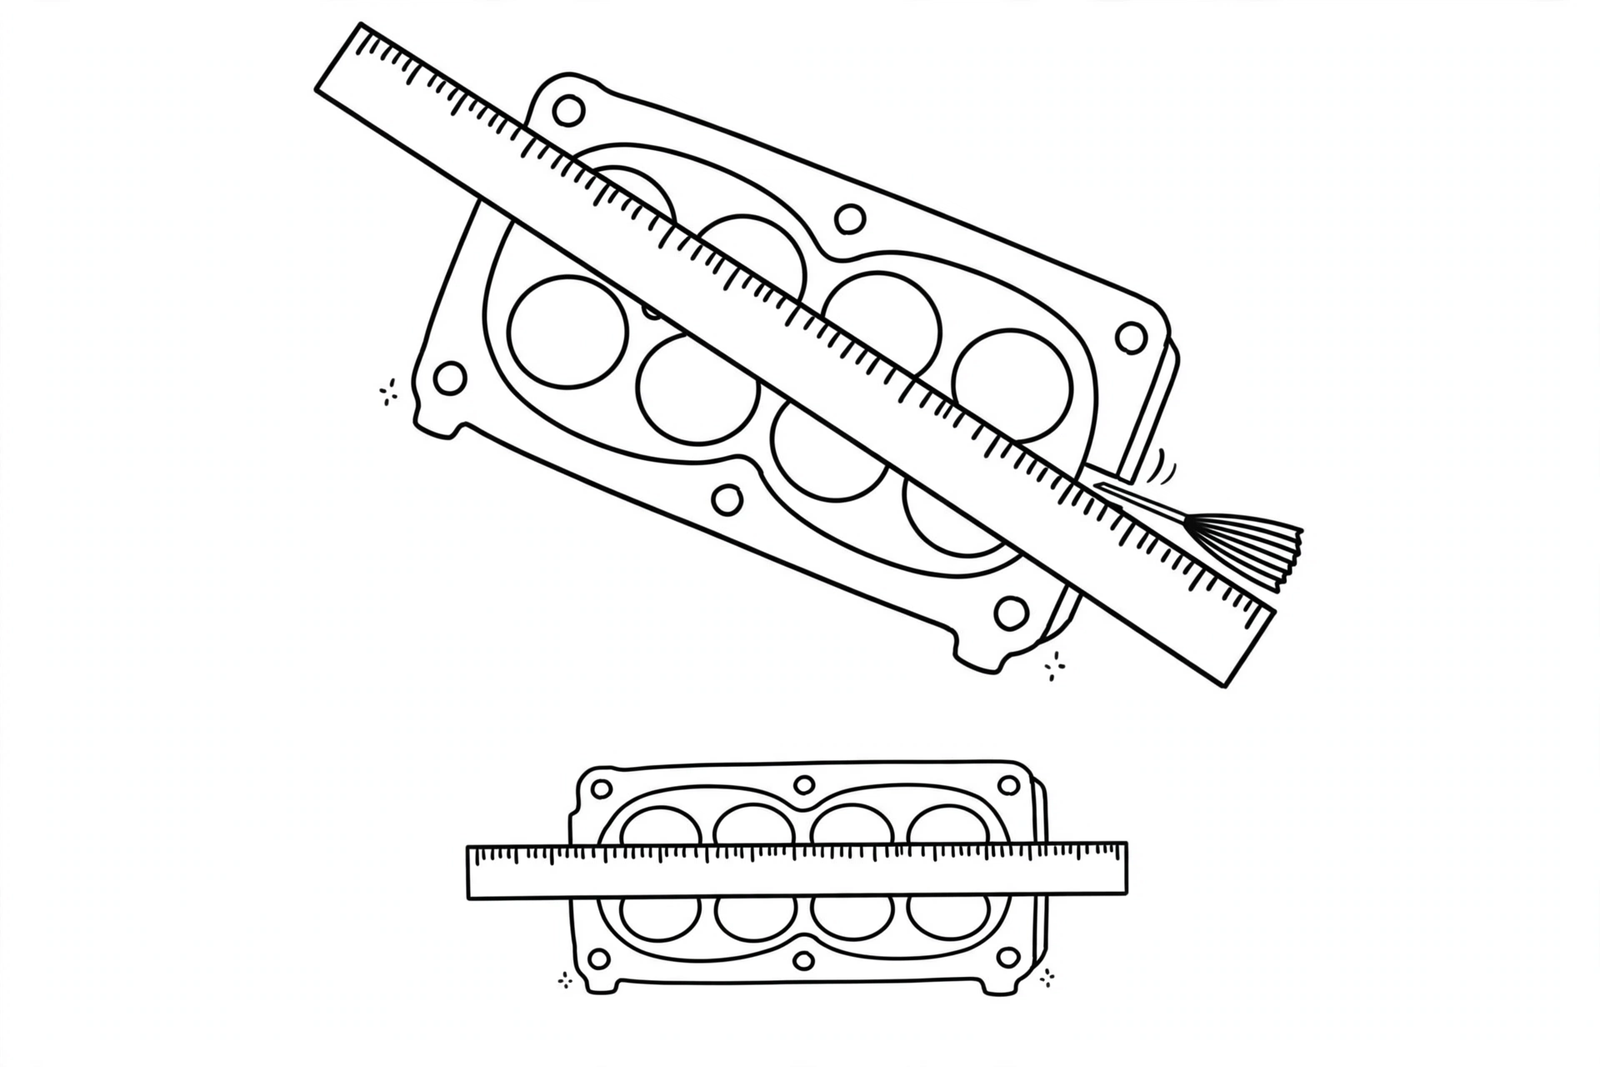
Checking the head deck with a straightedge and feeler gauge, diagonal and lengthwise.
Parts and tools for this job
OEM parts first, because this is not the job to redo over a cheap gasket:
- OEM Toyota engine gasket kit, part 04111-50410, confirmed to fit the 2005-2009 GX470: $308 with free shipping from Oem-Autopartz on eBay. Toyota OEM Genuine Engine Head Gasket Kit 04111-50410
- OEM Toyota cylinder head bolt set, part 90910-02181, all 20 bolts for both heads: $130 plus $52 shipping from mag-engines on eBay. Genuine OEM Cylinder Head Bolt Set 90910-02181
- AISIN TKT-021 timing belt kit with water pump, the kit GX470 owners reach for, since the belt comes off for this job anyway.
- Fabater 24 inch precision straightedge for the deck warpage checks above.
- Lisle 81810 carbide scraper for stripping old gasket material without gouging the aluminum head.
Sources
- Lexus GX470 factory service manual, Engine Mechanical
Leave a Reply